AGE VERIFICATION
This website requires you to be 21 years or older to enter. Please confirm your age below to continue.
February 22, 2021 by Angela Laufer
Cannabis-infused butter (cannabutter) is one of the most simple and common ways to make infused cannabis edibles. However, making infused butter can be a little bit tricky. In order to activate its psychoactive potential, the flower must be heated slowly at a low temperature in a process called decarboxylation. If you’d like to know the how and why of decarboxylation, check out our A Beginner’s Guide to Cannabis Decarboxylation before following this step-by-step guide to infusing butter
Butter is a delicious and versatile carrier for THC and other cannabinoids, although it isn’t the only one. You can also use coconut oil, olive oil, or any other fatty oil for your infusions.
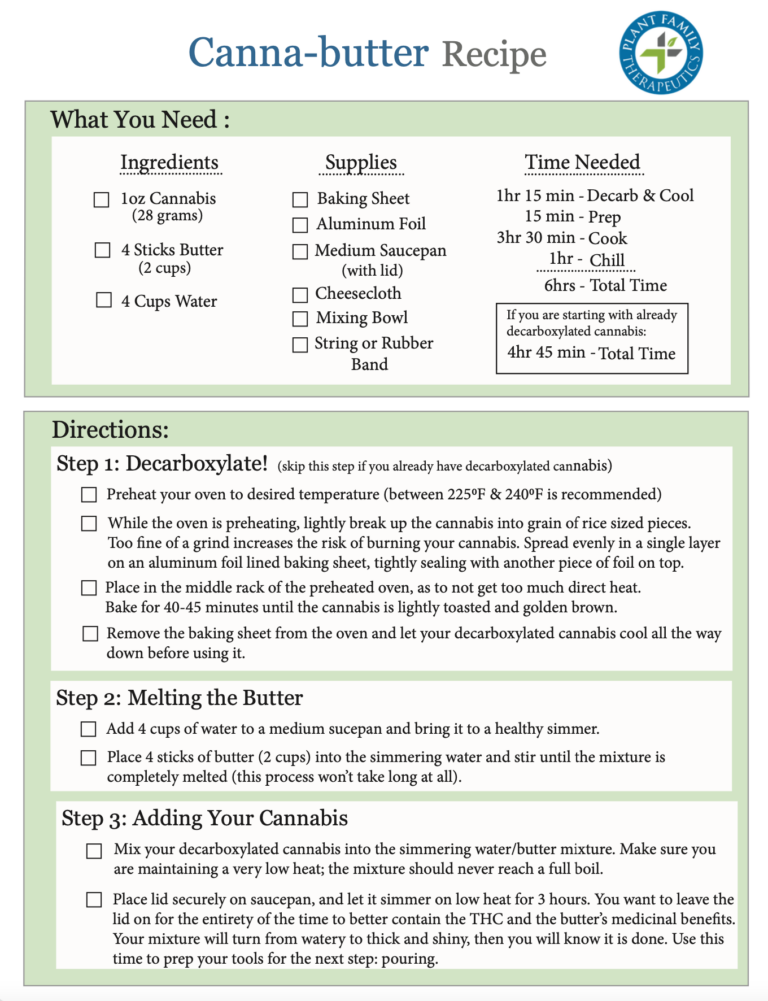
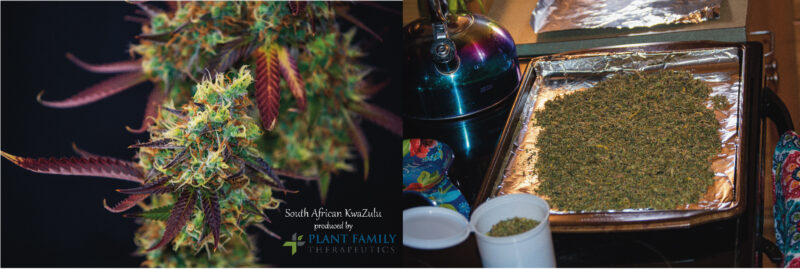
Step 1: Decarboxylate! Decarb temperature and time vary from source to course, chef to chef. I’ve seen decarbing in the oven done from 225°F in a single layer on a baking sheet for 45 minutes, to 240°F for 40 minutes. Keep in mind that the length of baking time will also depend on the type of flower you are using. Is it more dense, wet and sticky? If so, you may want to lengthen your time. Is it drier, with a looser bud structure? Then you may want to bake for a shorter time. While the oven is warming up, you’re going to want to lightly break up the cannabis until is about the size of a grain of rice. If you grind it too finely, you’ll increase the risk of burning your cannabis. Spread the cannabis evenly in a single layer on aluminum foil in a baking sheet (preferably with sides so you don’t lose any flower in the process), then tightly seal another piece of foil on top so you don’t lose any THC from the decarbing process and place in the middle rack of the oven as to not get too much direct heat. When your baking time is finished, the cannabis should look lightly toasted and golden brown. Remove the baking sheet from the oven and let your decarboxylated cannabis cool for 30 minutes at room temperature before using it in your desired recipe. For this recipe, I used our very own Plant Family Therapeutics’ grown South African KwaZulu (:
Step 2: Melting the Butter: Now you bring the butter in! But the first question is, how much butter is enough? A good equivalency is 4 sticks of butter (2 cups) to one ounce (28grams) of cannabis flower. So, 2 sticks of butter (1 cup) for a half ounce of cannabis, or one stick for a quarter ounce. You get it!
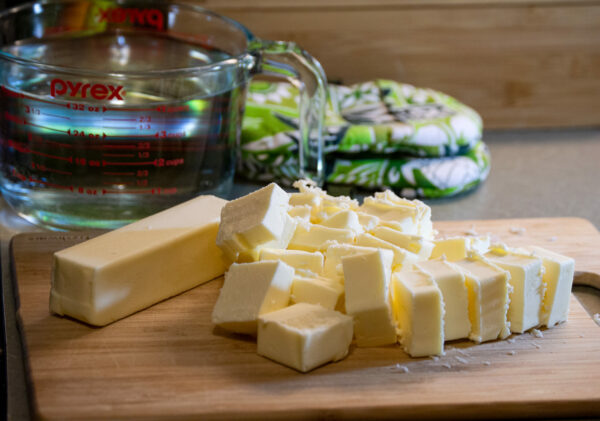
For each stick of butter used, you want a cup of water added to a medium saucepan -adding water helps to regulate temperature and prevents the butter from scorching. -Keep in mind, butter can burn easily if you don’t keep a close and watchful eye on it as it cooks. –
Let’s say we are using an ounce of cannabis. (For my recipe, I used our trim and shake, so I used an ounce and a quarter total -35 grams-.) Add 4 cups of water into a medium saucepan (make sure the saucepan you are using also has a tight-fitting lid for when you add your cannabis) and bring to a good simmer. Place your 4 sticks of butter into the simmering water and stir the mix until it is completely melted. This process won’t take long at all.
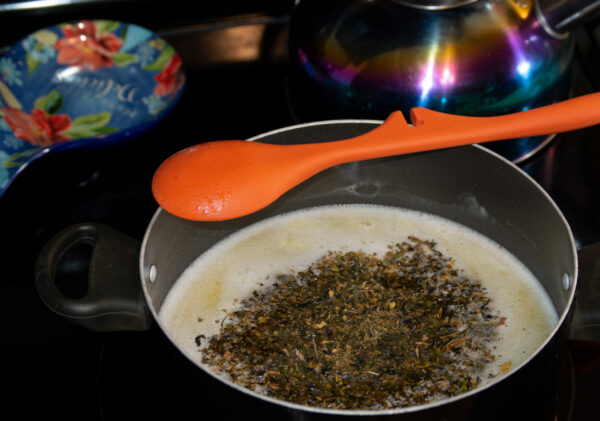
Step 3: Adding Your Cannabis: Mix in your cannabis (plant matter) to the simmering water/butter mixture, making sure you are maintaining a very low heat. Ideally, you want to be above 160°F but never exceeding 200°F; the mixture should never come to a full boil. Now comes the hard part: waiting. Let your cannabis butter and water mixture simmer for three hours, with a tight fitting on your saucepan. Again, the reason for this is to make sure you aren’t losing any THC by letting it evaporate out, and so you can maintain the most amount of medicinal benefit possible. The top of your mixture will turn from watery to thick and shiny, in which then you will know it is done. During this process, you can use the waiting time to prep your tools for the pouring stage. (:
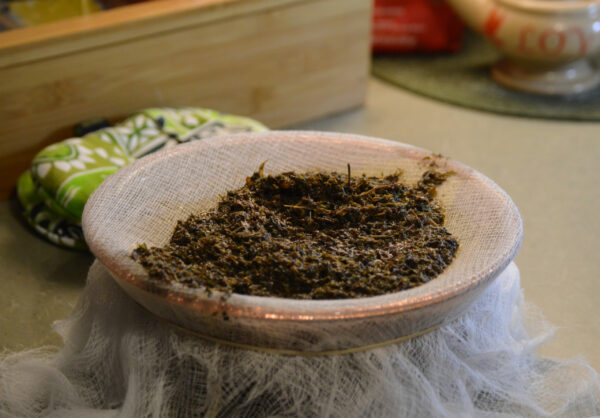
Step 4: Pouring Your Mixture: For this step, you will need some cheesecloth, sturdy string or rubber band, and a mixing bowl or jar that can withstand hot liquids (think a Pyrex or metal mixing bowl). Secure two layer of cheesecloth over the top or your mixing bowl with your string. You’re going to be pouring a rather heavy and hot mixture onto the cheesecloth, so make sure you have enough cloth so that it won’t pull out from under the string. And secure the string lower on the bowl, where it’s a smaller diameter versus the lip, so that it doesn’t slide right off.
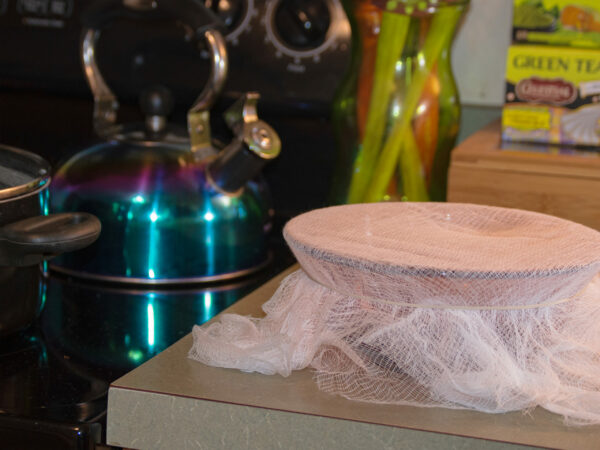
Using hot pads or oven mits is recommended in this step -safety first-! When the pot is completely empty, take the four corners of the cheesecloth and make a small bag out of it. You can squeeze gently to ensure you’ve gotten the most out of your cannabutter mixture.
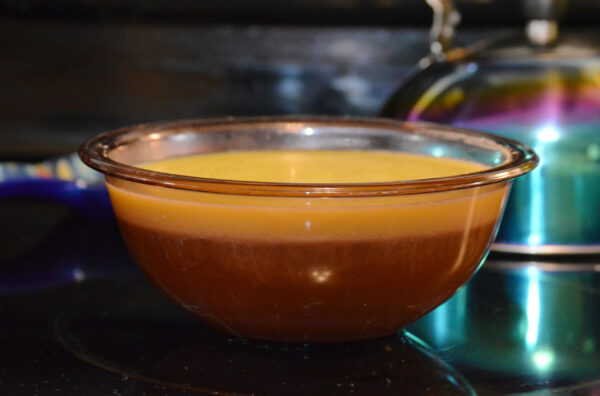
Step 5: Letting it Cool: Place your covered mixing bowl in the refrigerator and allow the cannabis butter to cool for an hour. During this hour, the butter will separate itself from any remaining water from the mixture straining process. When the hour has passed and the top layer is solid, you will know it is ready.
Run a knife along the edge of the butter as you would the outside of a cake pan, carefully lift the butter out and place on a clean towel on a cutting board to dab dry any remaining water or moisture. And voila! There you have it.
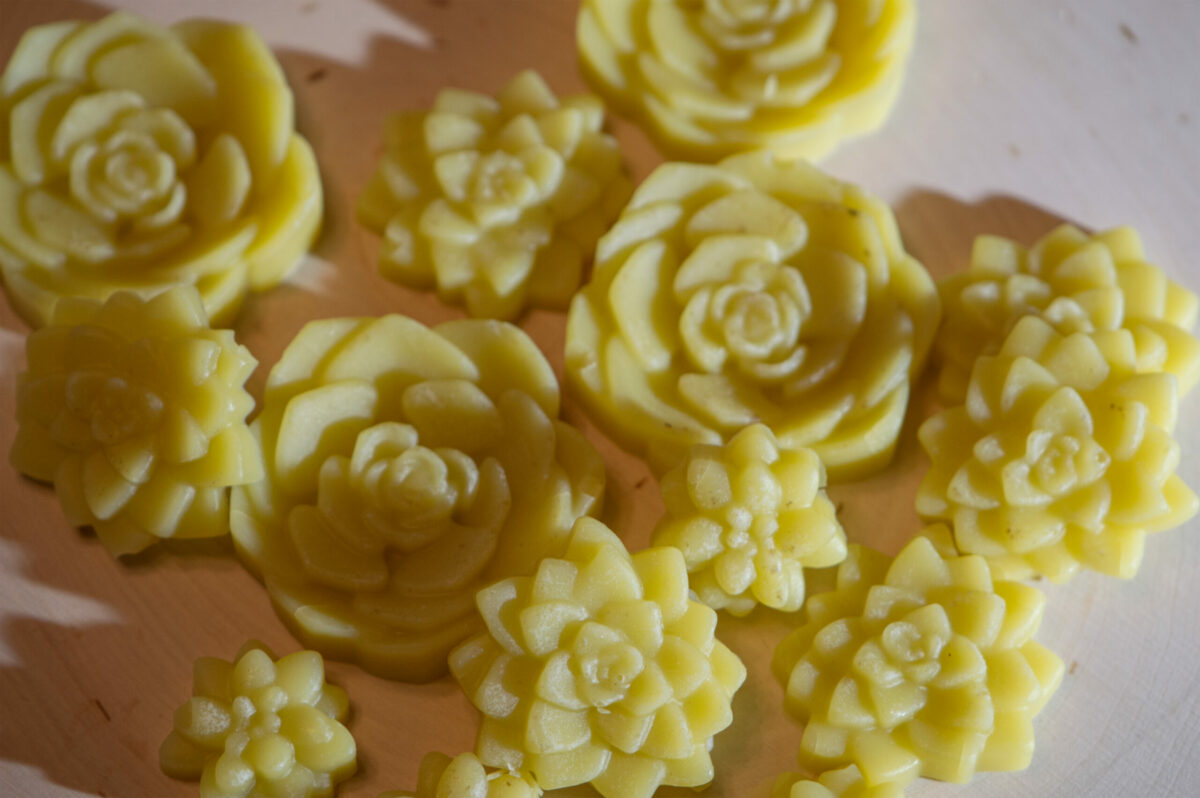
I couldn’t find molds specifically for butter at our local store, but I did find flower molds in a variety of sizes and thought they may just work. (: I slowly re-melted my cannabutter down -under very low heat- after the first cooling process and poured it into the molds to cool over-night. This way, I have a selection of sizes, for different recipes and uses… plus they are cute!
Cooking with Cannabutter
A good starting point for ingesting cannabis edibles is to limit yourself to <5mg THC ; even less if you are new to THC-infused food. It can have the tendency to be a lot stronger, more intense, and can differ drastically from smoking it. For one, the effects can take anywhere from a half hour to 3 hours to fully metabolize, depending on an individual’s unique body and metabolic rate. In addition, because the THC is digested through your liver, and can more readily cross the body’s blood-brain barrier, the high can be stronger and last longer.
With that said, your butter’s potency depends on many factors, from how long and hot it was cooked, to the potency of your starting product, as well as taking into consideration if your strain was indica or sativa leaning. To test the potency and effect of your finished product, try spreading ¼ or ½ tsp on a snack and see how that dose affects you after an hour or so. Titrate your dose as desired, and you can then use this personalized “standard” dose as a baseline for your recipes.
Happy Cooking!